
Its been years since I was serious about blogging.
That’s going to change right now… expect to see something from me just about every day now
- Ding
Its been years since I was serious about blogging.
That’s going to change right now… expect to see something from me just about every day now
I have been doing Project Management for a long time, but never got around to getting certified.

In my previous role as a Product Development Manager for example, I sccessfuly managed multiple projects concurrently (as many as 7 at a time) some with short scope, while others were multi team member projects spanning multiple years.
That experience gave me alll the work experience that the PMI requires, and I already have completed all the educational PDU requirements, from training I have attended plus courses in Management that I completed as part of my Master’s Degree in Public Administration.
I have now gotten motivated to get Certified. I hae re-joined the PMI (Project Management Institute), and am in the process of preparing to take the official exam to be certified as a PMP (Project Management Professional).
Wish me luck, as the 4 hour sit down exam will be rough (and lots of people fail it), but I am well on my way to completing it.
Andy
I have been focusing a lot on Social Media interaction recently instead of writing blog articles.
Specifically, I set up twitter accounts for
In addition to twitter activity, I have been focusing on
Services that I am on but am not quite as heavily using at the moment include:
Why don’t you take a moment and follow me, or take a look at my recent posts?
I am interested in hearing your thoughts.
Cheers,
Andy
A while back, I wrote an article about the online selling market in New Zealand. Today we will look at recent developments and see how the playing field stacks up in 2013.
As before, Trademe is still the dominant player in the market.
Wheedle is back. As discussed on NBR, Wheedle has conducted a security review, and after closing it’s doors for 6 months, are now open for business again. They had a decent number of followers and products but have wiped that information following their security revamp. With $10 million+ budget, some attractive features, and a large amount of press coverage, they will get some business.
Another player that I was not previously aware of is EzyAuctioNZ. I they offer free listings, and some good features, but have the same hurdle as many other startups – gaining sellers. The old chicken and the egg… How do you get buyers, if you dont have sellers? And how do you attract sellers if there are no buyers? They have been open since 2006, founded by “gifted web guru” Scott G., and have close to 6000 members. I will follow their progress and update you if their numbers grow.
Sella has closed. shop. The grew exponentially since starting three years ago to become New Zealands’s second largest auction site with over 725,000 visits each month. They merged in 2012 with Trade & Exchange!, and now An article on NBR said they are closing: APN folds auction site Sella, Bradley leaves the APN building, and that March 31 is the last day to list an auction. Going to their’s sell link shows a discussion about their purchase by NZ Herald Online, and the fact that you can no longer sell items through sella.
In this third article about using ArcMaps for analysing property locations, we will continue the search demonstration that we started in the previous GIS article.
The next step is to select the road segment that will be built. and then use ArcMap search functionality to locate and run a geoprocessing tool to determine the parcels whose businesses and residents will need to be notified about the construction project.
From the Selection menu, choose Select By Attributes.
The query screen will show the following:

Now click OK and you will see the selected street segment highlighted in blue near the center of your map.
Open the Search window, and at the top of the window, click Tools. In the Search field, type Buffer and click the Search button. 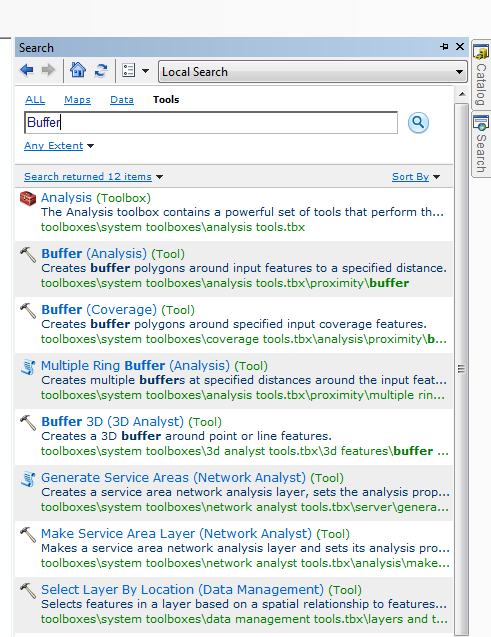 In the list of search results, click the Buffer (Analysis) tool. Clicking the tool name in the search results opens the tool, just as if you had opened the tool from ArcToolbox.

In the tool’s dialog box, do the following:
Choose Streets for Input Features, and for Linear unit, type 500, and confirm that units are set to feet
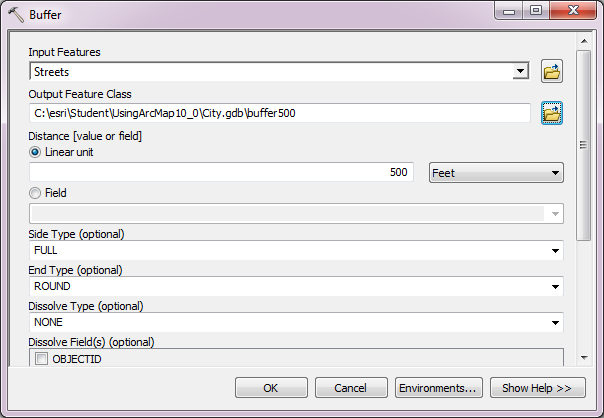
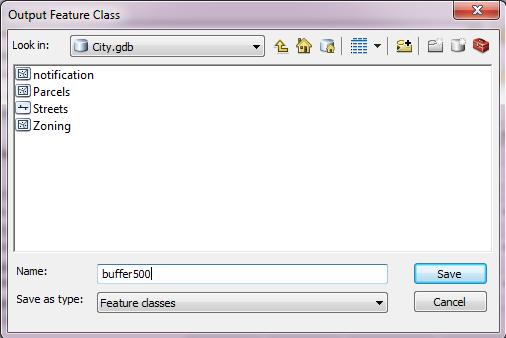
for Output Feature Class, browse to your City geodatabase and name the output Buffer500.
Click OK to run the Buffer tool. While the tool is running, notice the name of the tool scrolling at the bottom of your ArcMap window. The Buffer tool allows you to be more productive by letting you continue to work in ArcMap while geoprocessing tools are running in the background. When the tool is finished, a message displays in the lower-right corner of your computer screen. The Buffer500 feature class is added to your map as a new layer.
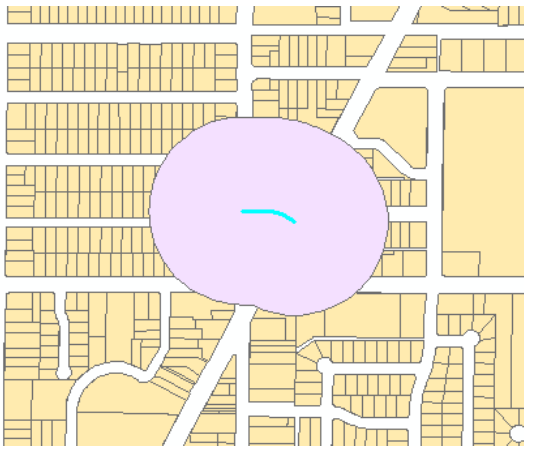
This shows the region within 500 ft of the road under construction. Now, we need to select the parcels that intersect the buffers, so that we can send the owners of these parcels a notification letter and maps showing the construction area.
From the Selection menu, choose Select By Location. For Selection method, confirm that select features from is selected, and for Target layer(s), choose Parcels.
For Source layer, choose Buffer500, and for Spatial selection method, confirm that Target layer(s) features intersect the Source layer feature is selected.
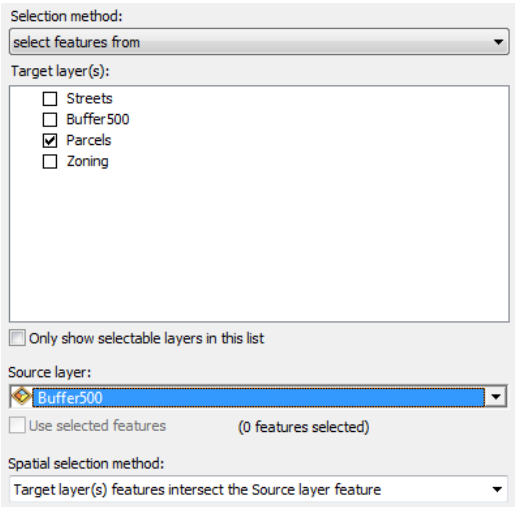
Finally, click OK to execute the spatial selection. At the top of the table of contents, click the List By Selection button. Your table of contents should look like the following example for the Parcels and Streets layers.
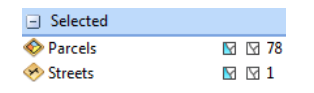
We now know the parcels selected that intersect the construction zone buffer, and can generate maps and letter for the affected owners. In the final article we will show this functionality.
Did a bit of hardware repair this week.
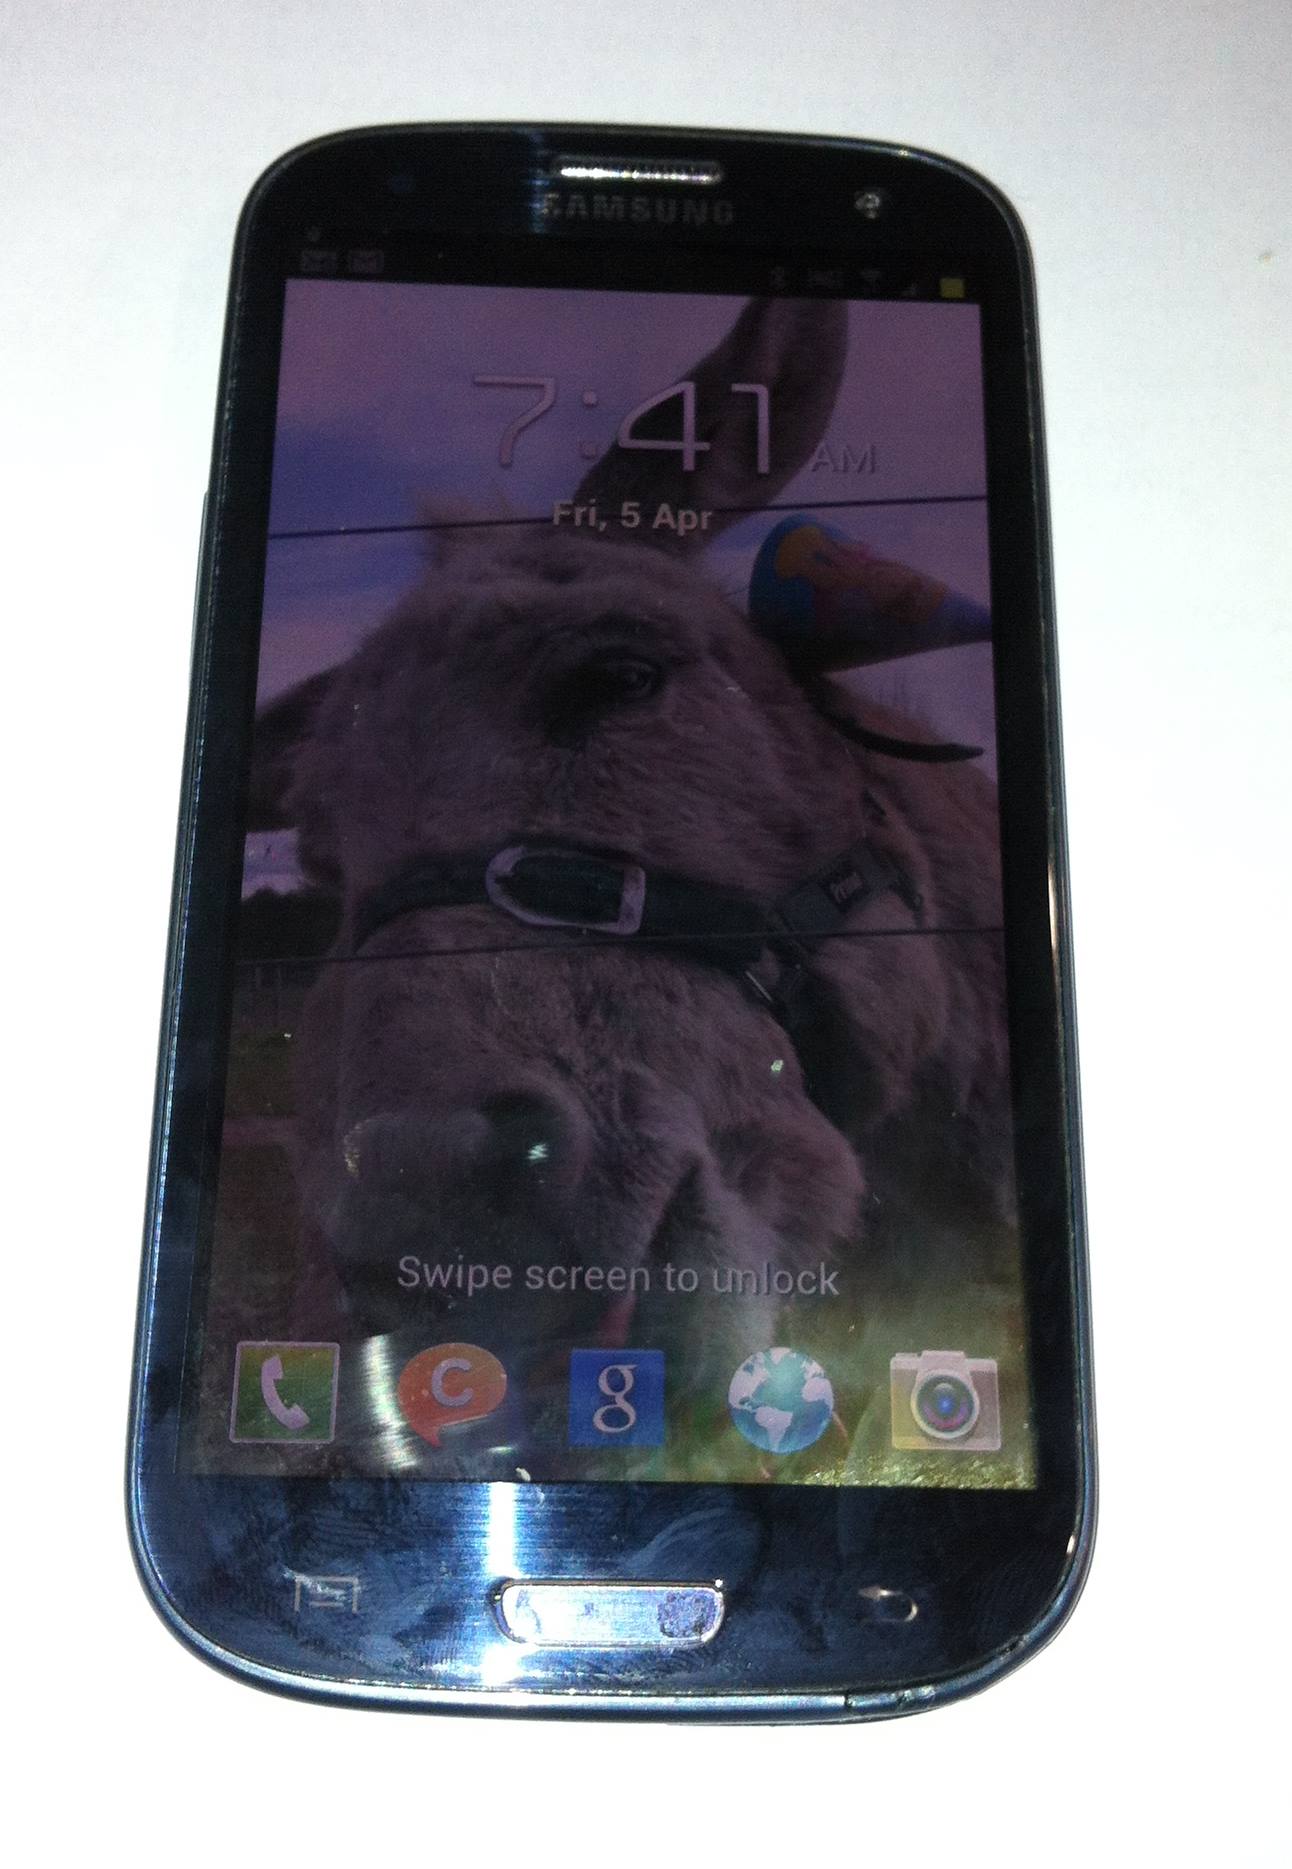
How about some Galaxy S3 Screen repair?Had to fully dissassemble all the interior parts and remove the motherboard and components. Here is the before:

And After:
Also, to make things more interesting, I took apart a laptop to fix a broken fan.
Talk about a mess, I had to remove 37,000 screws, and remove multiple panels connected by 97 ribbon cables. They don’t make them like they used to. Not my favorite activity.
In part Two of the article about Using ArcGIS ArcMaps for analysing property locations, we will follow up on what we learned in the last article. We will this time focus on adding some data intellegence, and will do some calculations to determine which properties are within a certain distance of the road that we centered on previously.
The first step to accomplish is to set the locations on your network in which you want to enable your search. This is done by adding a location and creating an index of the tools and data available.
To do this, click the Index / Search Options button in the search tab (click search in the right margin) and in the dialog box that appears, confirm that the Index tab is selected. Then click Add.
In the Browse Folders to be Indexed dialog box, click the Go To Home Folder button, click the City geodatabase, then click Select.
Finally, locate the Index / Search Options dialog box, and at the bottom of the dialog, click Index New Items. This will cause ArcGIS to build an index of data and tools located within the UsingArcMap10 folder. The index will take a few moments to create.
You can watch the progress of the indexing in the Indexing Status section of the Index / Search Options window. When the Indexing Status is set to Active, the new index is built and ready for search, so click OK. In the Search Window, click the Data link. This will allow you to restrict your search to the data you want.
In the Search window, enter the search term: parcels
This will return a list of data that contain the term parcels. The one we are interested in is named: Parcels (File Geodatabase Feature Class) and has a path that contains \student\usingarcmap10_0\city.gdb\parcels.
Drag the Parcels data onto your map. You will now see the Parcels layer added to your map and the table of contents.
Notice the Parcels layer is now listed in the left table of contents.
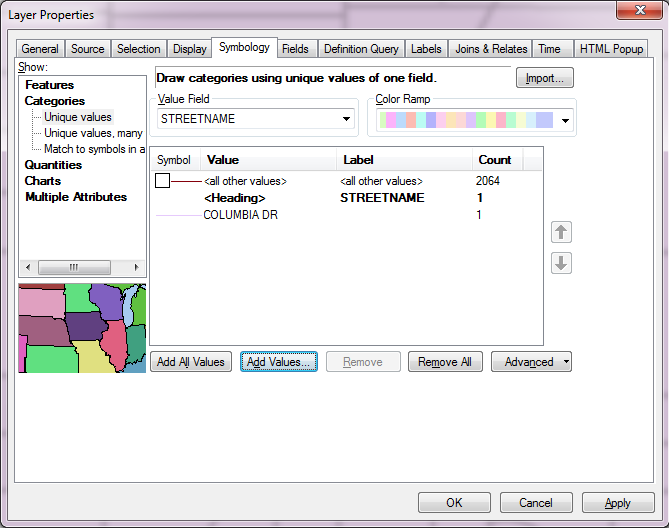
In the table of contents, right-click the Streets layer and choose Properties, and click the Symbology tab.
On the left side of the dialog box, under Show, click Categories, and confirm that Unique Values is selected. Under Value Field, confirm that STREETNAME is selected.
At the bottom of the dialog box, click Add Values. In the Add Values dialog box, click Complete List. Scroll down the list of street names and click COLUMBIA DR, and then click OK. You now have two categories of features, COLUMBIA DR and <all other values>. Uncheck the box next to <all other values> and the screen will look as follows:
Now you will use the Symbol Selector to symbolize the road segment, so that it is clearly visible on the map as “under construction”. Click OK to close the Layer Properties and (In the table of contents) click the symbol next to COLUMBIA DR. The Symbol Selector will appear, which enables you to change the symbol for COLUMBIA DR.
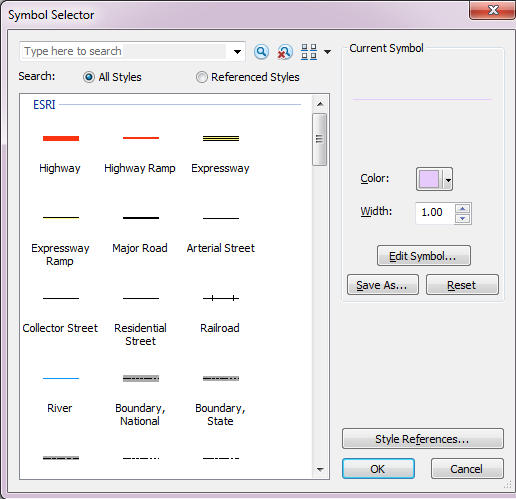
In the Search field at the top of this dialog, type the word repair and click the Search button. Two symbols will be listed in the search results, click the one with the double line, as it is easier to see. In the Symbol Selector, do the following: Click the down arrow next to the color patch and choose a red color, and set the Width to 0.8, then click OK to close the dialog.
Once you have set the street symbol, you will see the following:
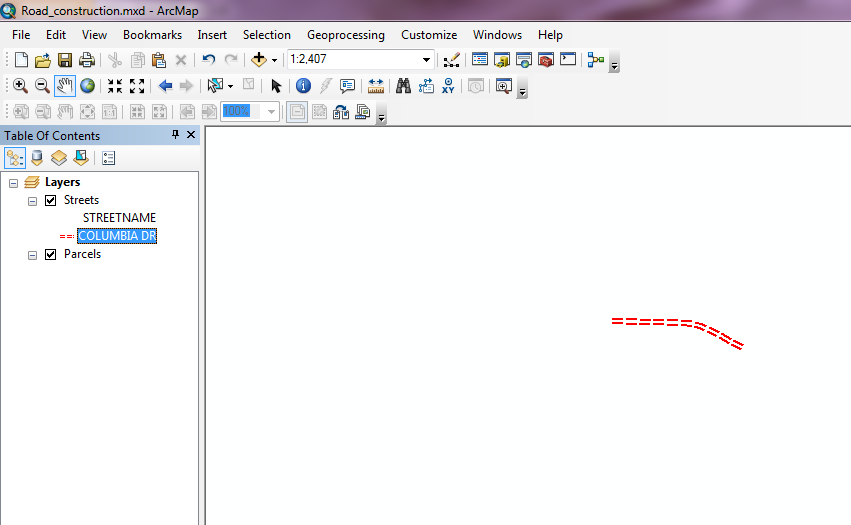
Now We are ready to select the properties which are located within a predefined distance from this road, which we will complete in part 3 of this walkthrough.
In this example, I will use the sample data provided by the ESRI tutorials, which are available online after registering a Global ESRI account. I highly recommend going through their tutorials, as they are a great resource.
If you need the sample data, download it from http://training.esri.com/Courses/UsingArcMap10_0/dataDownload.cfm
First start up ArcMaps, as described in my previous post. Once open ArcMaps, you will see an opening screen that ask for the data source.
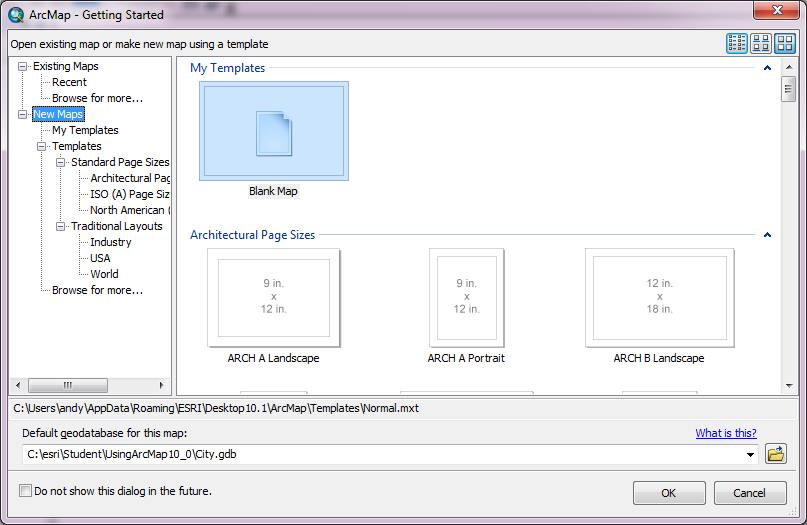
On this screen, we want to create a map, using the City.gbd geodatabase as our data source. Instead of using a blank map, we want to click Existing Maps, and Browse for more. Then Navigate to your example install location, (C:\Student\UsingArcMap10_0 folder), and click Road_construction.mxd, and finally click Open.
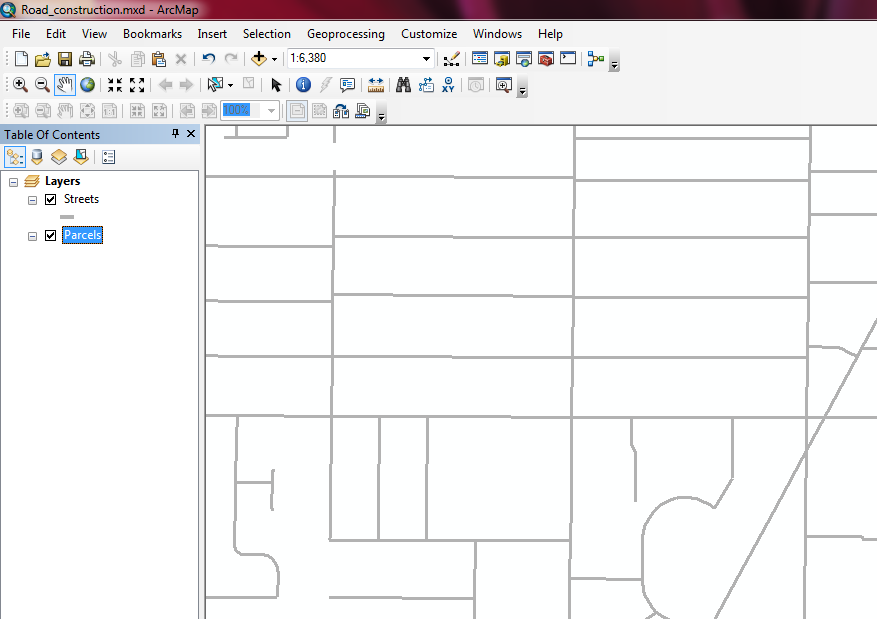
Once ArcMap has opened, using the city geodatabase, the following main program will be displayed:
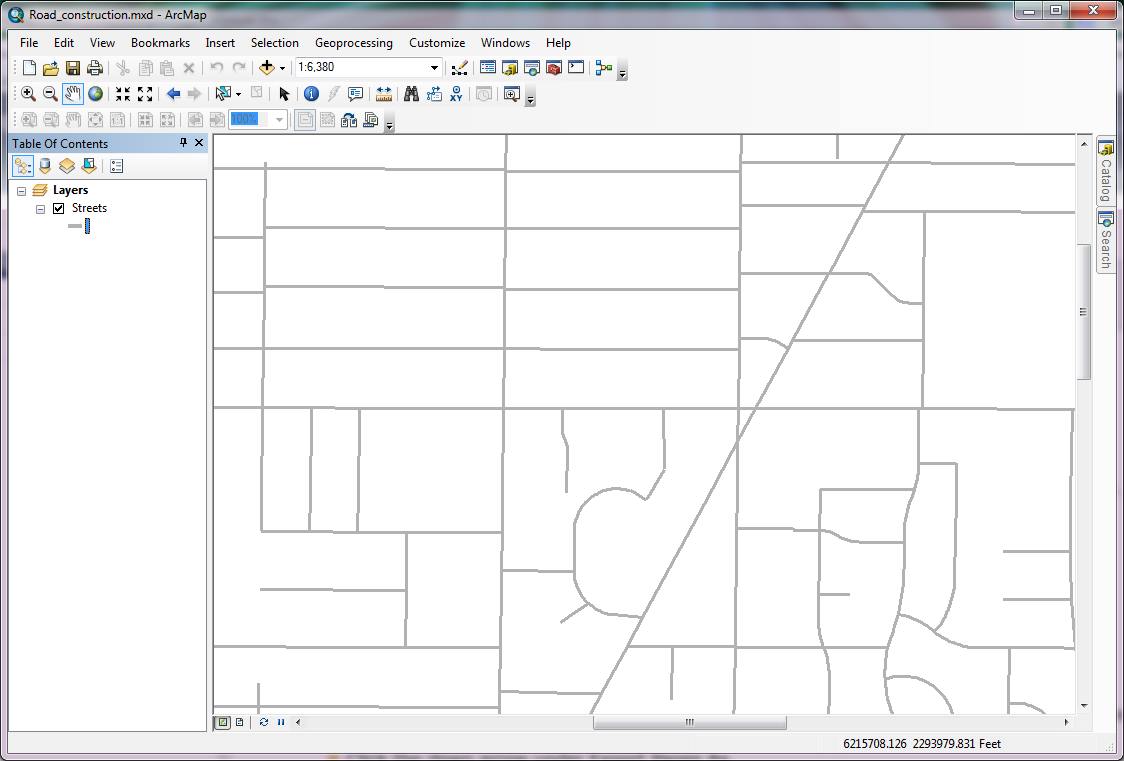
The area on the left of the screen is known as the table of contents. It currently shows one layer, which is “streets”. Notice the checkbox, which you can tick (or untick) to hide or show the street layer.
Now, from the Bookmarks menu, choose “Construction Zone”. This will centre your street layer in the area we are using in this example.
Now, click the Catalog tab on the right side of the ArcMap display, to display available catalogs. We are going to drag the once of these onto our map to add additional information.
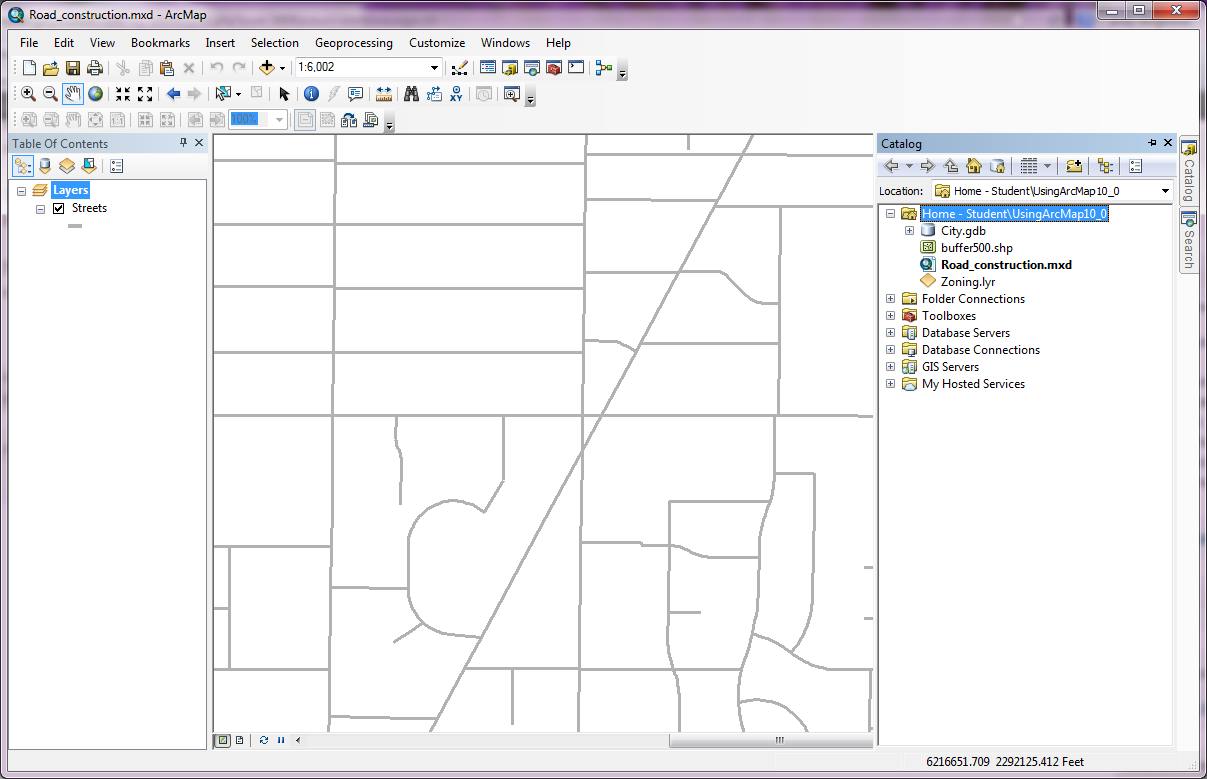
Now, click on the zoning layer in the catalog and drag it into the main window area (where the street map is currently displayed), and drop it on top of the street maps. This will add a new layer to the table of contents on the left, and will change the visible layer in the main window
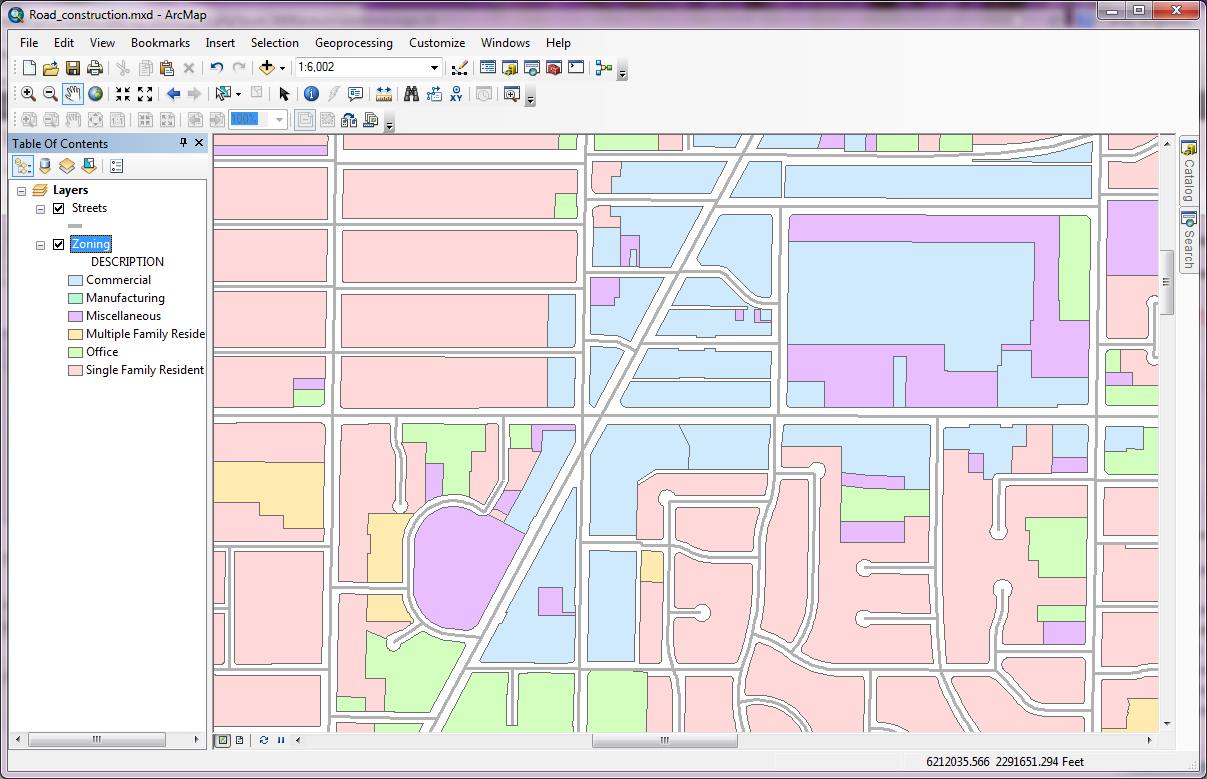
Again notice that you can turn this layer on or off (hide it) in the table of contents.
In the next blog article, I will go through searching for data, where we will add property information to the map, and determine which properties are close to a specific area of concern (in this case a bit of road construction).
Following up on my last post about GIS (http://computingasyoulikeit.com/getting-started-with-gis/) I am writing today about installing and launching one of the most widely used GIS tools available today.
I have chosen ESRI as the principal GIS tool to use, as they are in my opinion the biggest player in the game. According to wikipedia, they are “the leading worldwide supplier of Geographic Information System (GIS) software and geodatabase management applications”, and “are used by an installed base of more than one million users in more than 350,000 organizations, including most US federal agencies and national mapping agencies.”
As one of my friends (Dr Rob Allison from SAS) once described them to me, they are the 300 lb Gorilla of the GIS industry. Yes there are other tools out there (such as Intramap)
but ESRI can do just about everything, if you have the $ to pay for it. A few open source products exist if you need one, including: Quantum GIS and OSGeo.org and penn state has some links as well.
If you want to try ArcGIS, go to their download link for ArcGIS Desktop this link will let you download a 60 day trial of the latest software (a single user version).
The first thing you will need to do is create a Esri Global Account. This registration is free, and gives you access to their download area. When I downloaded it (ArcGIS for Desktop, version 10.1) the size was just under 1 GB. Note: Requires Microsoft .Net Framework 3.5 SP1. I installed under windows 7.
Also available but not discussed here are links to:
After downloading, I installed the ArcGIS for Desktop application (ArcGIS_Desktop_101_129796.exe) and the tutorial application (ArcGIS_Desktop_Tutorial_Data_101_129884.exe)
Once installed, the following menu has been added:

It may not be immediately obvious what product you need to launch from the ArcGIS folder, as there is no link for ArcGIS Desktop, ArcInfo or ArcView. The one to launch is ArcMap 10.1
In my next post, I will walk you though some of ArcMap’s features
I wrote an article over a year ago about how to get twitter followers, and thought it would be a good idea to provide an update.
The key point I would make is:
You do NOT have to pay for twitter followers.
I have close to 5000 and have never paid a cent. Yes it is a bit slower, but doing it over time will get you better followers, who are more likely to stick with you, assuming you provide decent, relevant content.
If you are a movie star (or Kim Dotcom), followers will come to you in flocks of thousands, so all you have to do is stit back and enjoy tweeting. Assuming you are not in that crowd, here are simple steps to get twitter followers:
Notes:
Now, go and follow me, and I will follow you back.
http://www.twitter.com/dingfelder