In this third article about using ArcMaps for analysing property locations, we will continue the search demonstration that we started in the previous GIS article.
The next step is to select the road segment that will be built. and then use ArcMap search functionality to locate and run a geoprocessing tool to determine the parcels whose businesses and residents will need to be notified about the construction project.
From the Selection menu, choose Select By Attributes.
- For Layer, choose Streets.
- For Method, choose Create a new selection.
- Build the expression: “STREETNAME” = ‘COLUMBIA DR’
The query screen will show the following:

Now click OK and you will see the selected street segment highlighted in blue near the center of your map.
Open the Search window, and at the top of the window, click Tools. In the Search field, type Buffer and click the Search button. 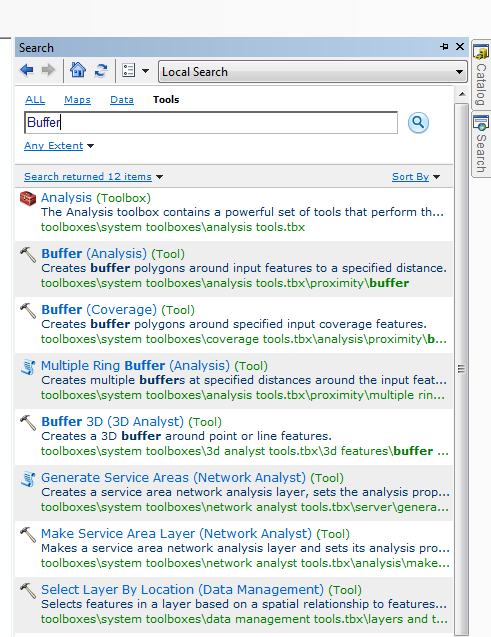 In the list of search results, click the Buffer (Analysis) tool. Clicking the tool name in the search results opens the tool, just as if you had opened the tool from ArcToolbox.

In the tool’s dialog box, do the following:
Choose Streets for Input Features, and for Linear unit, type 500, and confirm that units are set to feet
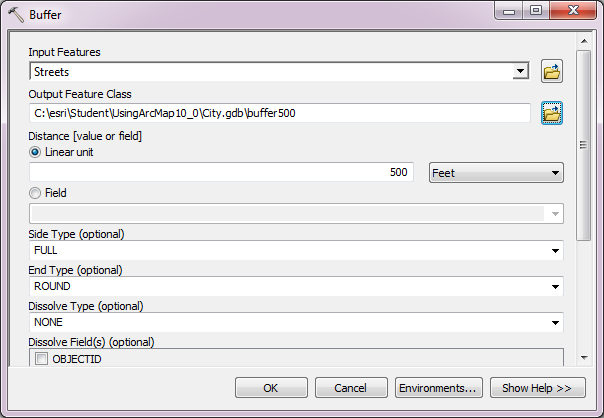
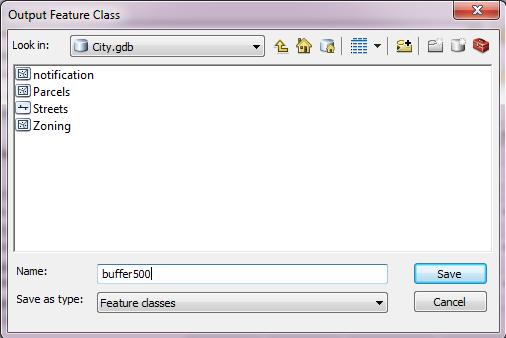
for Output Feature Class, browse to your City geodatabase and name the output Buffer500.
Click OK to run the Buffer tool. While the tool is running, notice the name of the tool scrolling at the bottom of your ArcMap window. The Buffer tool allows you to be more productive by letting you continue to work in ArcMap while geoprocessing tools are running in the background. When the tool is finished, a message displays in the lower-right corner of your computer screen. The Buffer500 feature class is added to your map as a new layer.
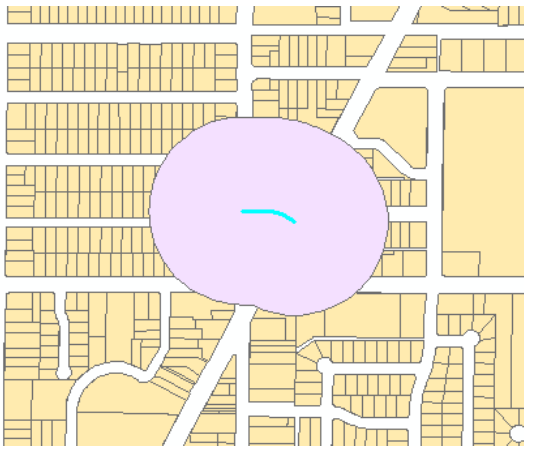
This shows the region within 500 ft of the road under construction. Now, we need to select the parcels that intersect the buffers, so that we can send the owners of these parcels a notification letter and maps showing the construction area.
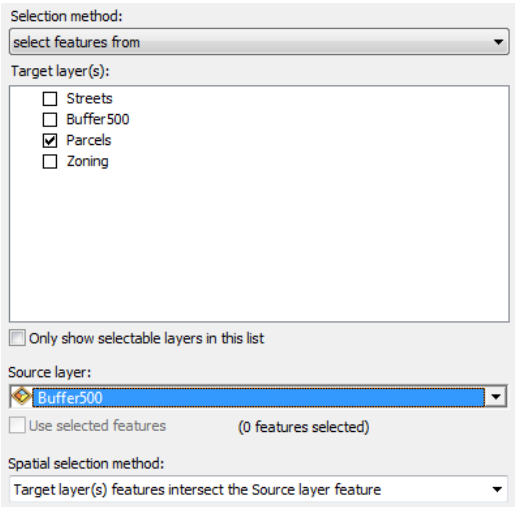
From the Selection menu, choose Select By Location. For Selection method, confirm that select features from is selected, and for Target layer(s), choose Parcels.
For Source layer, choose Buffer500, and for Spatial selection method, confirm that Target layer(s) features intersect the Source layer feature is selected.
Finally, click OK to execute the spatial selection. At the top of the table of contents, click the List By Selection button. Your table of contents should look like the following example for the Parcels and Streets layers.
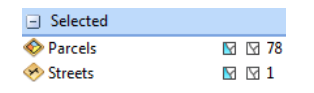
We now know the parcels selected that intersect the construction zone buffer, and can generate maps and letter for the affected owners. In the final article we will show this functionality.